
Appearance
Overview of Online CS-102
Assignment Workflow with the HTML Checker
Assignment Workflow
It is recommended you follow a workflow similar to the one described, below, when completing assignments
Getting Started
- Review the Assignment in Canvas
- Note the file name, content, HTML tags, Style Sheet elements, etc. for the assignment
- Review the Lessons for that week/assignment
- Lessons may present more than 1 way to create web content. Refer to the Assignment information for the specific elements to use
- Set up a new assignment folder
- For assignment 1, copy the
starter-kitfiles into a new folder - For later assignments, create a new folder and copy the previous assignment files into a new folder for the current assignment
- For assignment 1, copy the
- Open the current assignment folder in VS Code
- Right-click on the assignment folder and select Open with Code
- or Start VS Code, then click File | Open Folder. Navigate to your assignment folder
- Once the assignment folder is open, you will see your files on the left-hand side
- Double-click on the
index.htmlfile to open and start Live Server. Verify the browser displays your web page
Start Live Server with an HTML file
Always double-click on an HTML file in VS Code before starting Live Server. The HTML file that is visible in VS Code is the one that will open in a browser once Live Server starts
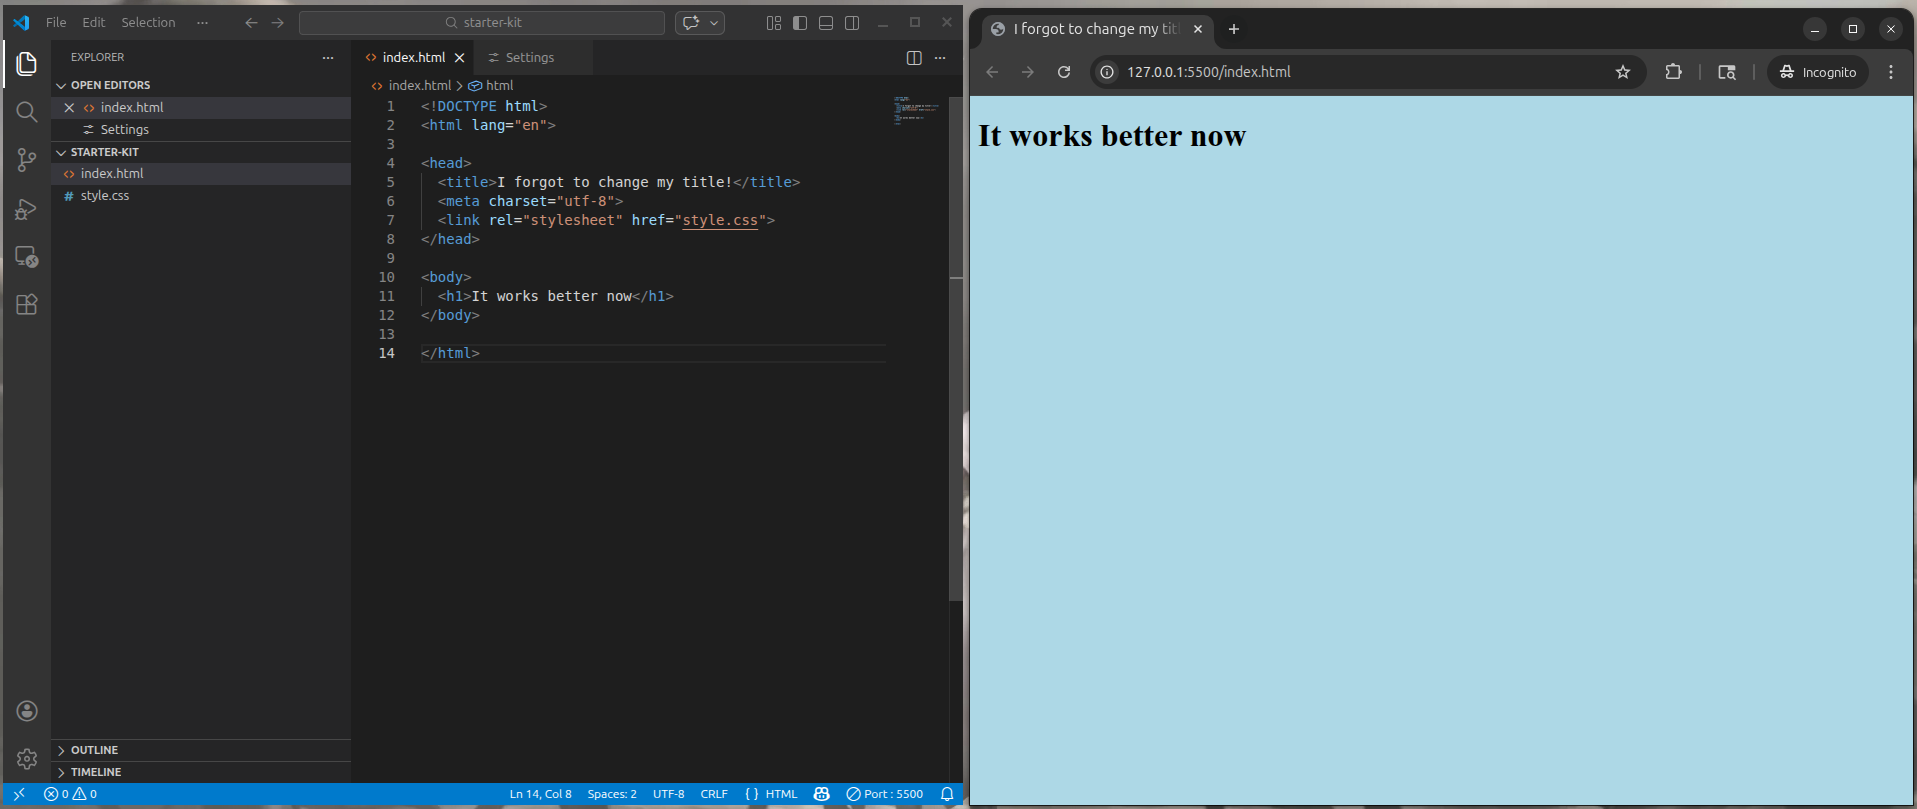 VS Code with Live Server Running and a Web Browser opened showing the HTML file
Add Elements for Your Project
- Based on the assignment information and what you learned from the weekly lesson(s), add HTML, CSS, and web page contents to your files
- Save your work regularly and review the updates in the browser Live Server opened
- Repeat updates and reviewing the Live Server browser preview until your project appears to satisfy the assignment requirements and standards
Check Your Project
Once you feel like you have completed the assignment, you can use the HTML Checker to compare your project files against the assignment goals and standards
- Follow the process in HTML Checker to check your project when you feel it is ready
- This will provide a detailed review of the contents in your files and check for common issues with the project
- After reviewing the results, you may need to go back into VS Code and make updates
- Review the assignment and the weekly lessons to help fix any issues
- Use the HTML Checker again to verify the updates fixed the issues
- Repeat this process until you are satisfied with your assignment
Create a Screenshot of the HTML Checker Results
Once you are satisfied with the results the HTML Checker is showing, create a screenshot of the filename/date time and Review Results sections
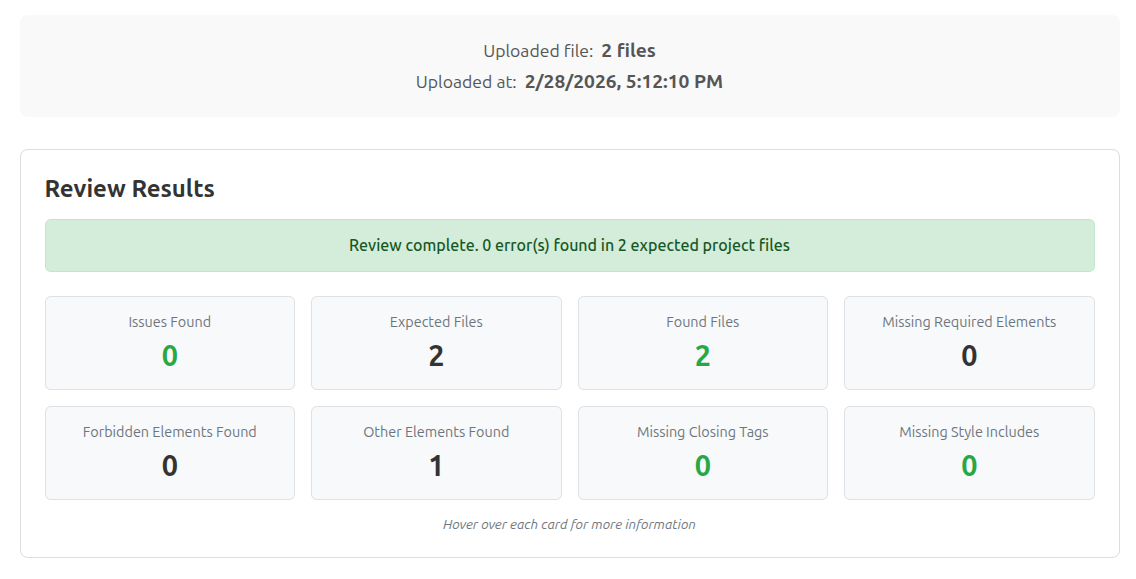
Add this screenshot file to your project folder
Prepare Your Project and Re-Check
- Zip your project folder
- On a Windows system
- Open the assignment folder
- Ctrl + A to select all files
- Right-click and select
- Windows 11 - Compress to ZIP file
- Windows 10 - Send to -> Compress (zipped) folder
- A zip file will be created with the same name as the folder
- On a Mac system
- Open the assignment folder
- Cmd + A to select all files
- Right-click and click Compress X Items
- A zip file will be created with the same name as the folder
- On a Windows system
- Switch back to the HTML Checker
- Select the assignment
- Drag and drop your zip file in the Drag .zip here or click to choose an assignment folder section
- Click the
Checkbutton - Review the results to ensure everything in your zip file are the correct files
- Submit the zip file via Canvas